Important Information
Before you could build your first ever PC, it’s important that you must familiarize yourself with the tools that are required to build and the safety precautions. These are required to guide you throughout the PC building process through the use of the appropriate tools and safety precautions. Understanding the necessary information will allow you to build your own PC without having to encounter any problems or issues in the long run and lessening the risk of damage that could happen with your newly built computer.
Required Tools
Each of these tools are required to be used appropriately when building your own PC. Many of these tools are designed for a purpose. Misusing or not using these tools properly can result in damaging your computer, and we are not responsible in misusing them.
Screwdriver
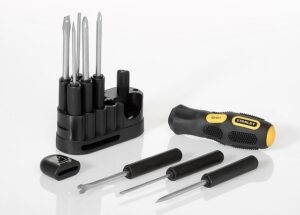
Photo by Pixies from Pixabay
You will need at least a Philips head screwdriver, preferably a screwdriver set where its heads can be swapped for the appropriate screwdriver bit. This tool that loosens or tightens screws by twisting the screwdriver either from left or right and is a must when it comes to building PCs, which can range from opening the computer case and installing the components in the PC. These include installing an NVMe SSD into the M.2 slot, mounting the CPU cooler into the motherboard, mounting the standoffs into the case and installing the motherboard into those standoffs, and many others.
Magnetic screwdrivers can also be used as well, as long as it does not go near the hard drives (as they are susceptible to magnetic damage). Never use any power tool, such as an electric screwdriver or a drill, as these can overtighten the screw and damage components.
Screw tray
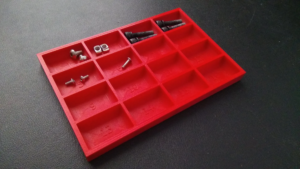
Photo by @ThatKid852_53657 from Printables
(OPTIONAL, BUT RECOMMENDED)
Screwing and unscrewing screws using a screwdriver can be a daunting task. Say that after you install your graphics card to the motherboard, you’re trying to screw the bracket of the card, but unfortunately that loose screw for that either fell from the table or misplaced somewhere in the room. Another scenario is that you’re trying to find the right screw for your power supply and unfortunately, one of those screws that you found don’t match. What you probably want to have when you’re building your computer is a screw tray or a screw organizer.
What it does is that it sorts the screws based on the type of screw that you have. Some screws are either short or long, and others are either narrow or wide. So, if you have a screw for say, your motherboard, you could put those screws into one of those boxes in the tray and it will match with the same type of screws (which can also be done on other types of screws as well).
Cable ties

Photo from Nelco Products
The last thing you want to do in your PC before you close the case and turn on your precious PC build is to do some cable management. You do not want the back of your computer to have an unorganized and jumbled mess of cables. When it comes to cable management, you either only need a Velcro cable tie or a twist tie, just to organize those cables.
We do not recommend using nylon cable ties, as these requires the nylon to be cut out once it’s tied, as it can cut some wiring at the back of the computer that you would have built if not used with caution.
Thermal paste
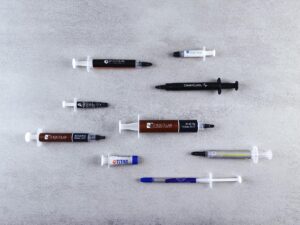
Photo by Andrey Matveev from Pexels
It is mandatory to have at least a packet or a tube of thermal paste when you are mounting a CPU cooler to the processor you’ve installed into the motherboard. What thermal paste does is that it allows for an efficient heat transfer from the IHS (integrated heat spreader) of the processor to the base plate or water block of the CPU cooler, whether it’s an air cooler, an AIO cooler or a liquid cooling setup.
Now when it comes to the brand for a thermal paste, the brand doesn’t matter as long it will be guaranteed to keep your PC operational at a stable temperature without thermal throttling or overheating.
USB flash drive
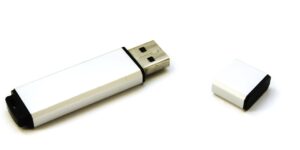
It is essential to have a USB flash drive, because once you’ve finished your PC build, you need to install an operating system of your choice (such as Windows 11), as well as the drivers and software that you want to install. This storage device can be plugged in to any computer with a USB port, as long as it’s bootable.
Safety Precautions
Before you handle those delicate components and building your first PC, you should follow the safety precautions first. This is a set of standard operating procedures that guides you in handling electronics carefully without damaging them, especially when you’re going to build your own PC. Please read them carefully and thoroughly, it’s your responsibility in handling and building your PC carefully in the process.
- Protect against electrostatic discharge (ESD)
Electrostatic discharge (or ESD) can damage or destroy sensitive electronic components when they’re exposed, such as processors, RAM sticks, and motherboards. It is the sudden transfer of static electricity between two objects with different electrostatic potentials, which often results in a visible spark. That spark can lead to the components being fried and that they’ll no longer function. In order to prevent electrostatic discharge, you can try to get a grounding tool such as an anti-static wrist straps, grounding mats, or grounding workbenches, which is considered to be the most effective way to prevent ESD damage. However, if you don’t have one of those tools, another good option is to try to touch a doorknob, or unpainted metal surface of the computer case. You also have to be mindful that you should avoid walking on carpets or wearing synthetic clothing, as these can generate static electricity as well. Until you’re ready to install that one computer component you have, try to keep it in its anti-static bag first. - Build your PC on a large, flat table in a well-lit area
A large, flat table in an area that is well-lit helps you build your PC by allowing space and ease of movement for the case and components, while preventing missed connections or incorrect placements. A large table or desk can have an ample amount of space that allows your case, components and tools to easily spread out, making them easy to find and reach within the table. In addition, the hard and flat surface of a large desk/table (such as a wooden table) allows to minimize the risk of damaging components from electrostatic discharge and that they’re more stable than carpets or other softer surfaces. - Handle components with care
The components that you’ve bought for your PC build can be delicate and expensive, once you mishandle those components (either by accident or intentional), it will no longer function and that you can’t replace them anymore as they are expensive to purchase them again. So, the best things to do when handling those components are to protect yourself against electrostatic discharge (ESD) by grounding yourself with an anti-static wristband or by touching a grounded metal object (such as a doorknob or an unpainted metal part of a computer case), avoid putting your components near dirt, dust or liquid, hold the components by the edges or casing, and avoid touching the pins, connectors, or circuitry. - Lastly, read the manuals of the components you bought
As you bought the components that you need for that PC build, please try to read the manuals that come with them. These manuals are helpful because they offer step-by-step instructions for installing each component, including steps on how to connect the cables properly and the steps to screw those components. In addition, these manuals also include compatibility information of your components if they are compatible with your motherboard and other parts, as well as troubleshooting sections (which can be helpful when you encounter an issue when building your PC) and performance optimization guides. You can also try to watch videos on YouTube to find instructions on how to install and configure your components as well.