Step-By-Step Guide on Building Your PC
With all of the tools ready and the parts that you have already bought, it’s time to build your very own computer. What you need to do is to read the “Important Information” page again, before you start building. Remember the read and follow the instructions thoroughly and sequentially just to at least prevent any mistakes or issues that could damage your PC during the build process.
Prepare your tools and unbox the parts you've bought
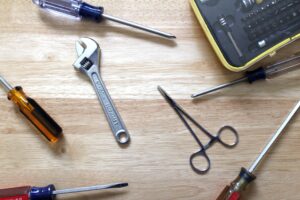
Photo by Alaina Yee / IDG from PCWorld
On your desk, gather and place your set of tools so that you don’t have any trouble finding them. These tools include your scissors, Philips head screwdriver, screw tray, cable ties, and thermal paste. Make sure you unbox the parts from its boxes along with their respective instruction manuals. Before you continue into the next step, please ground yourself, either by touching a doorknob or an unpainted part of the computer case or wear an anti-static wrist strap, and don’t let your parts be near any form of liquid, dirt or debris.
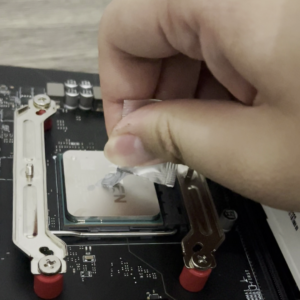
Install the CPU onto the socket of your motherboard
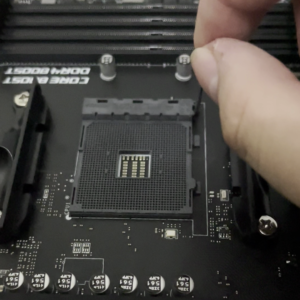
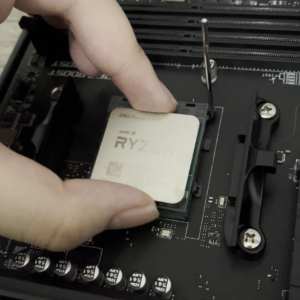
Take out the motherboard out of its box and anti-static bag and place it in front of you on top of the desk or the motherboard’s box. Whether the processor and the compatible motherboard that you have is either PGA or LGA, please be very careful and really cautious when handling those items as they are delicate and that once you bend one of your pins, it will no longer function (unless if you try to fix those bent pins). So please don’t drop them into the socket.
For AMD AM4 processors: These AMD processors have pins underneath of them. Release the tension latch alongside the socket and lift the latch, which the retention frame will shift backwards. Make sure that the orientation of your processor aligns with the triangle on the bottom-left corner on both the processor and the AM4 socket. Once both of them have their triangle aligned, you can line-up the processor’s pins and drop it gently into the socket and lower the latch, which it will close by shifting the socket forward.
For AMD AM5 processors: Unlike AMD’s AM4 processors, AM5 processors use a land grid array package, in which they are connected via the pins of the motherboard. What you are going to do is to simply release the latch and lift the retention bracket. Simply place the CPU down carefully into the socket and make sure that it aligns with the triangle on the top-right corner of the processor and the notches on the edges of the processor. Once it’s flushed and fully into the socket, push down the latch carefully and make secure to it under the hook.
For Intel LGA1700 processors: The process of installing a compatible Intel processor to the LGA1700 socket is similar to installing a compatible AMD processor on an AM5 socket, because both of these processors use a land grid array package. You’ll notice that LGA1700 motherboards have a protective cover in the socket, which protects the delicate pins that connects to your CPU. First, release the latch and lift the retention bracket. Then, place the processor into the socket correctly and make sure that it aligns with the triangle on the bottom-left corner of the processor and the notches on the side of the processor. As you close down the retention bracket of the processor and push down the latch carefully, the protective cover will pop off.
Installing the RAM
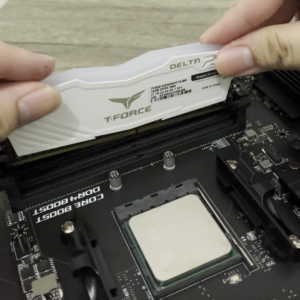
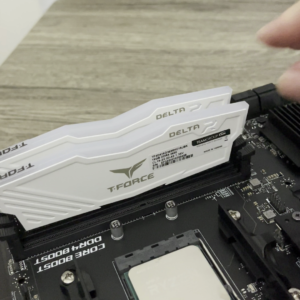
Installing the RAM onto your motherboard is a surprisingly easy and fairly straightforward process. You need to make sure that your RAM sticks are compatible with your motherboard’s RAM slot before you take them out of the box.
Once you checked that it’s compatible with your motherboard, press down the latches on slots DIMM_A2 and DIMM_B2 (the second and fourth DDR4 or DDR5 RAM slots of your motherboard) and insert them into those slots correctly and aligned with the notch at the bottom of those slots, meaning that those slots are required to have those RAM sticks operate in a dual-channel configuration. Once those RAM sticks are installed, the notches will pop (which closes them back up).
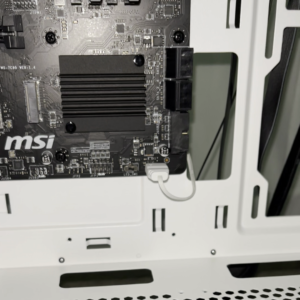
Installing the M.2 SSD
Much like the RAM slots, installing a solid-state drive onto the M.2 NVMe slot on your motherboard is easier than what you may think. The M.2 slot can be found either near the processor’s socket or at the bottom of the motherboard. Make sure that the SSD that you’ve bought is an M.2 2280 and that it’s NVMe.
To install a solid-state drive into the M.2 slot, remove the screw from the standoff and make sure that your SSD is installed gently by sliding it into the slot. Make sure that your M.2 SSD is laid flat into the slot by screwing it down a light tight.
If you have an M.2 SSD with a built-in heatsink cover or your motherboard has one, make sure that the SSD is screwed down a little tight with the heatsink cover on top of it.
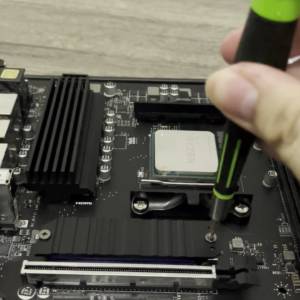
Installing the CPU cooler
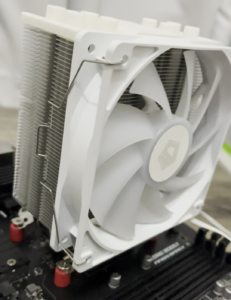
Before you install your CPU cooler choice, whether that would an air cooler or an AIO cooler, you need to make sure that your motherboard’s built-in cooling backplate (for Intel’s LGA1700 motherboards only) or bracket must be removed (which depends on the cooler that you have).
For AMD’s AM4 or AM5 motherboards, unscrew the two brackets on the sides of the processor. Each bracket has two screws. Once you unscrew those brackets, remove those brackets. When those brackets have been removed, install the standoffs and its own brackets (if possible) that came with your CPU cooler. Make sure you use the correct length of threaded screws and standoffs in order to make those brackets secure.
For Intel’s LGA1700 motherboards, unscrew the motherboard’s cooling backplate and replace it with the compatible backplate that your CPU cooler comes with. Then, screw down the replacement backplate.
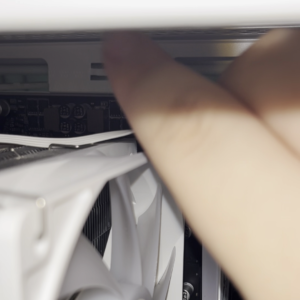
If you’re installing an air cooler, make sure that install the brackets that come with it by screwing them either into the standoffs (if you’re using an AM4 or AM5 motherboard) or into the backplate (if you’re using a LGA1700 motherboard). Then, apply some thermal paste on top of the processor and do not forget to peel that sticker off from the cooler’s heatsink. After that, make sure that you screw down the heatsink by lining up to the bracket’s screw holes and make sure that the screws thread evenly by tightening those screws back and forth. Then, once you’ve installed the heatsink, install the fan by aligning it to the left side of the heatsink and clip it in. Finally, connect the air cooler to the CPU fan header to your mother and the ARGB header via an ARGB controller (if available).
If you’re installing an all-in-one (AIO) cooler, you need to install the standoffs that come with that cooler by screwing them into the motherboard, either as its own standoffs (if you’re using an AM4 or AM5 motherboard) or into the backplate (if you’re using an LGA1700 motherboard). Make sure that the fans of the AIO cooler must be securely screwed in place into the radiator. Then, install radiator to the PC case. Make sure that the radiator is installed at the top of the PC case and that the case you bought has enough clearance for the it. Next, install the pump bracket that’s compatible with your motherboard’s socket and apply some thermal paste on top of the processor and do not forget to peel that sticker off from the cooler’s heatsink. After that, secure the CPU pump with the four screws provided. Lastly, connect the two cables to a pump fan header (if available on your motherboard) and the radiator fans to the CPU fan header and the ARGB header via an ARGB controller.
Mounting the I/O shield
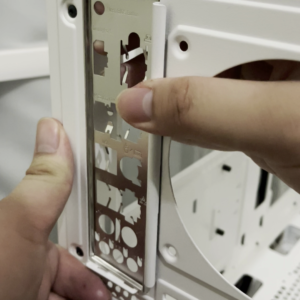
Before you install your motherboard into the case, you need to install what is known as an I/O shield. This shield fits into the back of a computer case and allows to cover the openings where the motherboard’s I/O connectors (like USB ports, audio jacks, etc.) are located, which is to protect the motherboard ports and ensure proper alignment and connection with the computer case.
Make sure that you bend the metal tabs before installing it into your computer case so that you won’t have any issues connecting your peripherals or devices to your computer with tabs blocking your ports.
When installing the I/O shield into your computer case, make sure to press the corners of the shield so that it can be secured. After that, when you install your motherboard to your PC, make sure that the ports align well with the ports’ cutouts.
Installing the motherboard into the case
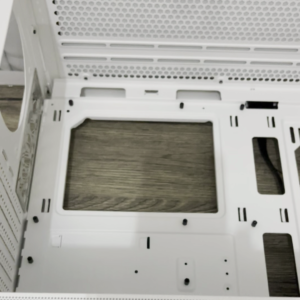
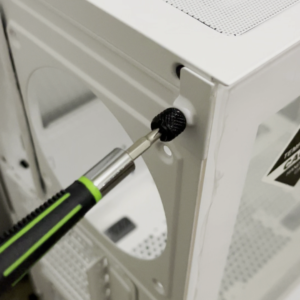
Before you start installing your precious motherboard into the case of your choice, whether it would be Micro-ATX, ATX or Mini-ITX, you will need to install a set of motherboard standoffs to the case. Make sure that the standoffs must align with the placement of screws of your motherboard, so that it does not end up being fried or no longer functioning. If one of the standoffs is not aligned under the motherboard’s screws placement, remove those standoffs from the case.
After that, place your motherboard inside the case and screw them based on the standoffs placed on the case. Make sure that the motherboard’s port must align with the I/O shield that’s installed in the case as well.
Once you’ve installed your motherboard into the case, it’s time to install the cables that are necessary for the computer to power and operate, and to install the power supply, case fans, and the graphics card.
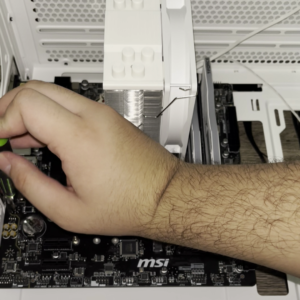
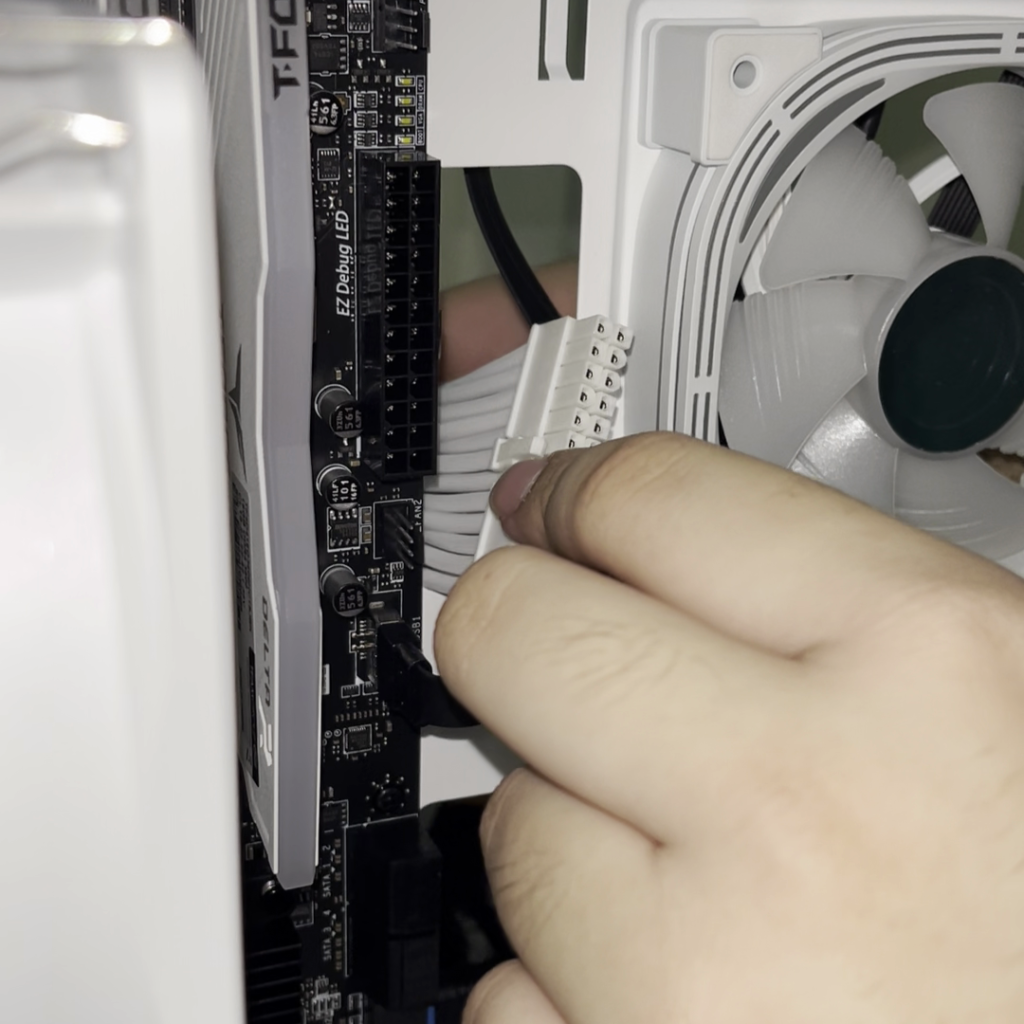
Connecting the front panel connectors and (optional) ARGB hub/controller to the motherboard
After you have installed your motherboard into your case, you will need connect your case’s front panel connectors and your fan or ARGB controller to your motherboard.
In order to connect your case’s front panel connectors, you will need the connect the following connectors to the motherboard’s headers:
- POWER SW (power switch)
- RESET SW (reset switch)
- POWER LED +/- (power LED)
- HDD LED +/- (hard disk drive LED)
- USB3 (either the 19-Pin Gen1 or Type-E Gen2 headers)
- USB2.0
- HD Audio
Make sure to read the manual of your motherboard that came in box or download from the manufacturer’s websites to find where these headers are located on the board, so that you can connect them without any issues.
If you want to connect your ARGB hub/controller to your motherboard, you could do so by connecting your addressable RGB case fans to the hub/controller and connect it to a motherboard that has an internal USB 2.0 header and power it either using SATA or Molex power connection (depending on what ARGB hub or controller that you have).
Installing the power supply unit (PSU)
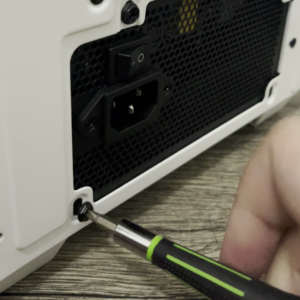
You will need to install a power supply unit (PSU) in order to provide power to your components by connecting them to each component, which include the motherboard, the CPU, any storage device that use SATA, graphics cards, and other devices that may use Molex or SATA power connectors.
To do this, unbox your power supply and slide it in the bottom of the case. Then, once you slide to the rear of the case (which shows the power switch and the AC power connector), secure the power supply using the supplied screws four times.
Now you’re ready to connect your power supply to your components of your PC.
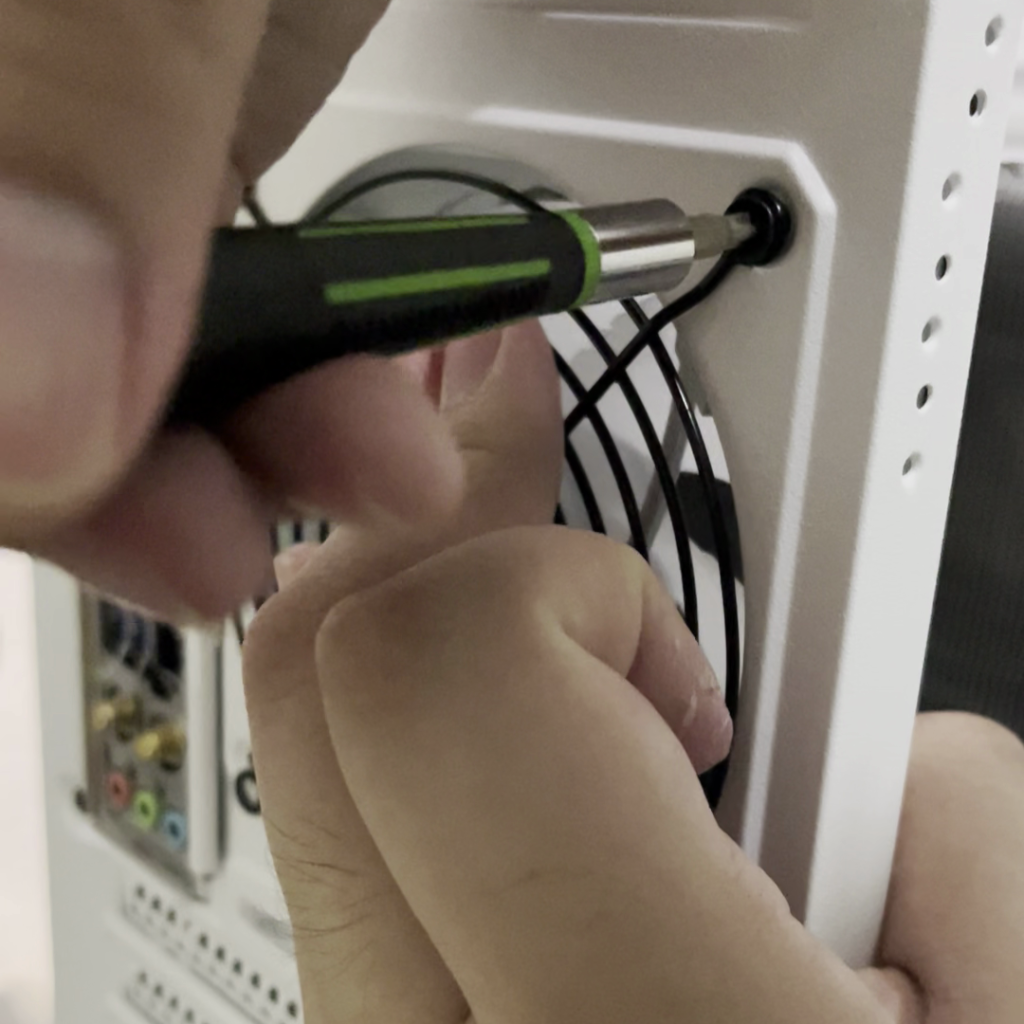
Installing the case fans
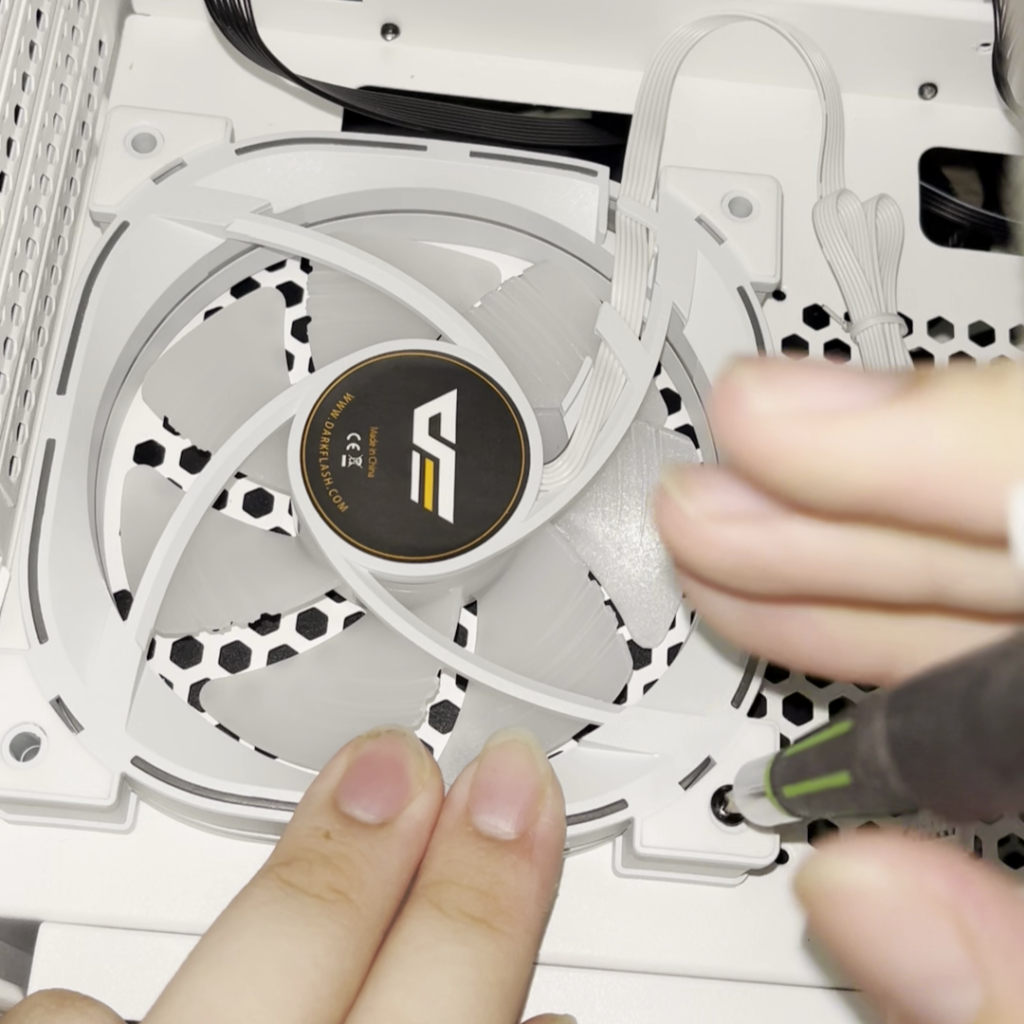
In order to have an optimal airflow, try to position your fans in the front of your case as ‘intake’ (in which intakes fresh air from outside the case, with the case fan being reversed), while the upper rear and the top of the case are positioned as ‘exhaust’ (in which it exhausts out heat from the PC).
To install a set of case fans for your PC build, start by placing a case fan somewhere in the case and screw it by four screws. Then, install your fans in the front of the case in an ‘intake’ position and install again the upper rear and the top of the case in an ‘exhaust’ position.
After that, connect your case fans to the motherboard via the SYS_FAN or CHA_FAN headers, or if your fans have RGB effects that are controllable using ARGB, you can also connect them via an ARGB hub/controller.
Connecting the PSU cables to the motherboard
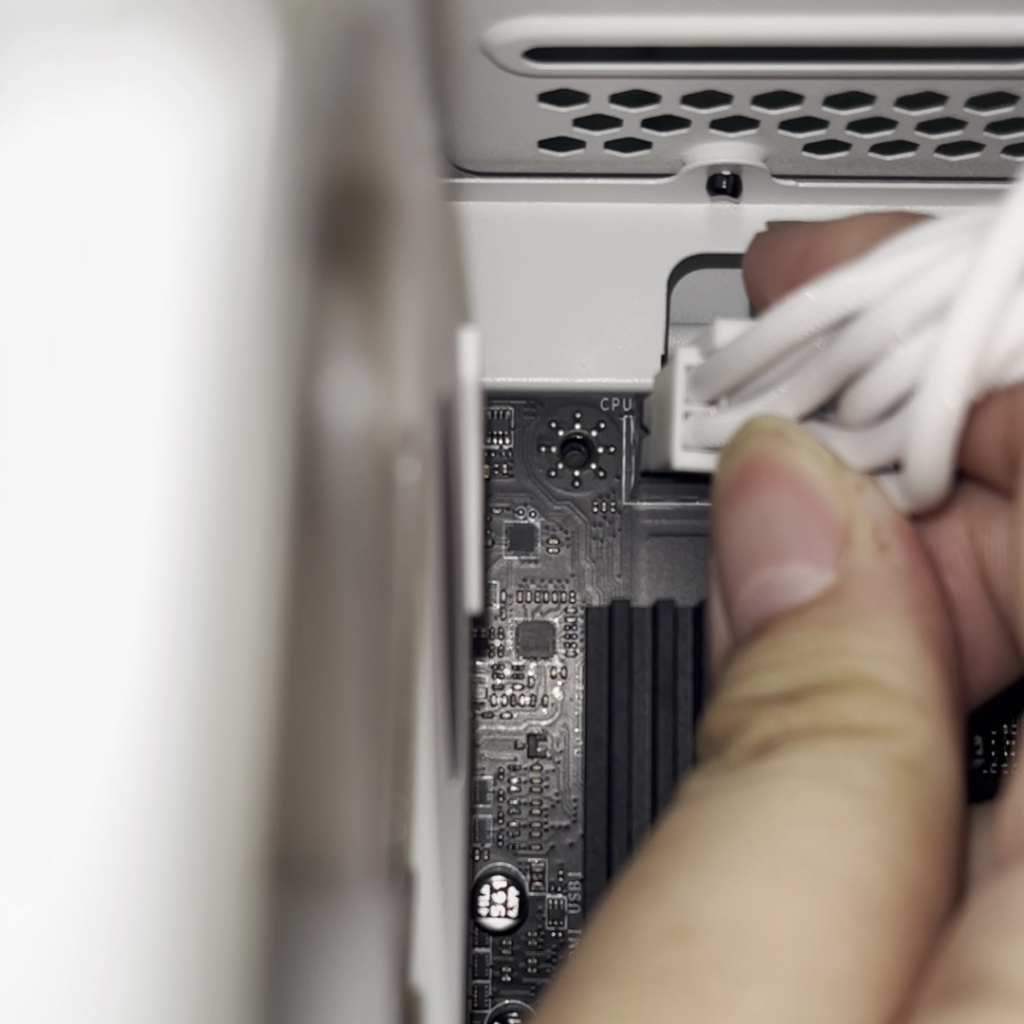
Once you have installed the power supply unit in your computer, you can now connect the necessary cables required to power your computer. Here are the connectors that are required to connect to the following components:
- ATX 24-pin – required for supplying power to the motherboard
- ATX12V 4-pin – required for supplying power to the CPU
- 4-pin Molex – used to supply power for other components
- Serial ATA power – required for supplying power to storage devices that uses SATA (such as hard drives, solid-state drives and optical drives) and also used to supply power for other components
- 6-pin/6+2-pin/12-pin – required for supplying power to PCI Express graphics cards
- 16-pin 12VHPWR/12V-2×6 – required for supplying power to high-end PCI Express graphics cards
Installing the graphics card and tidying up
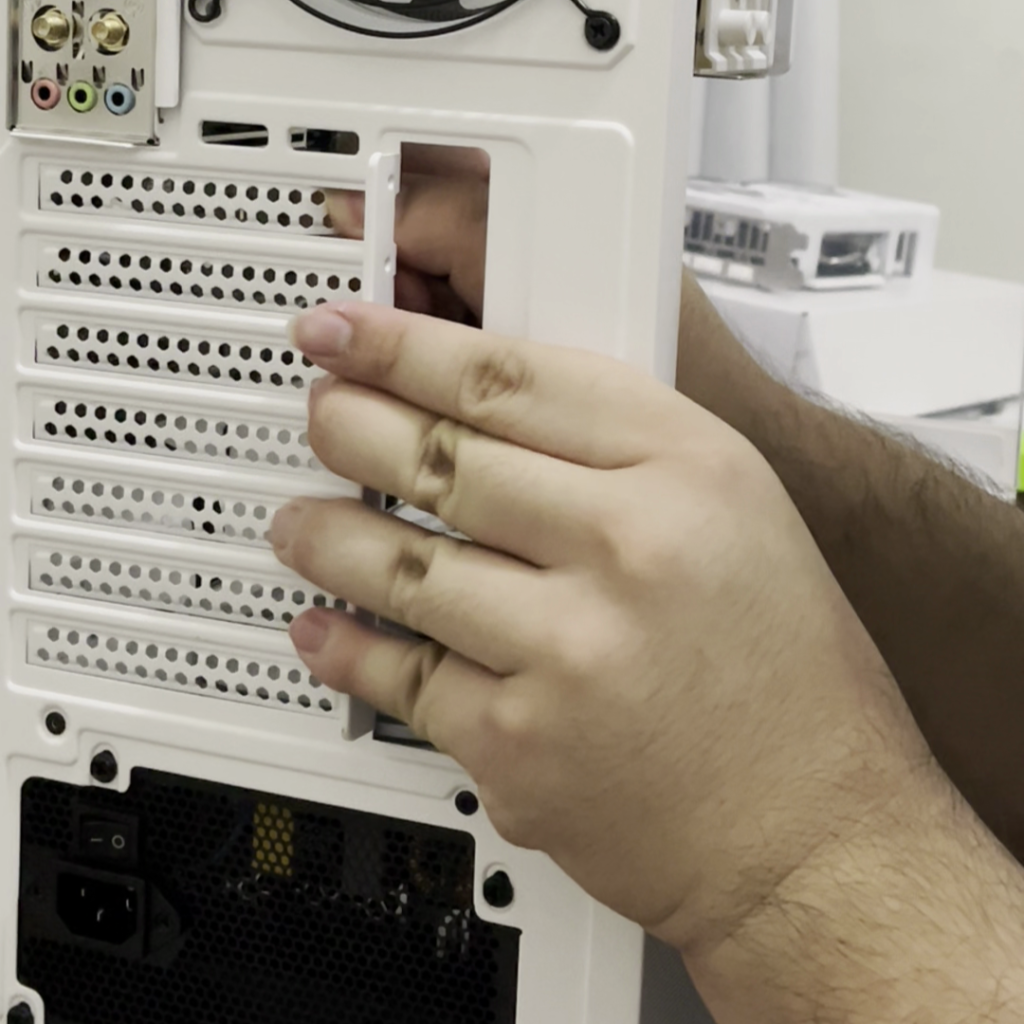
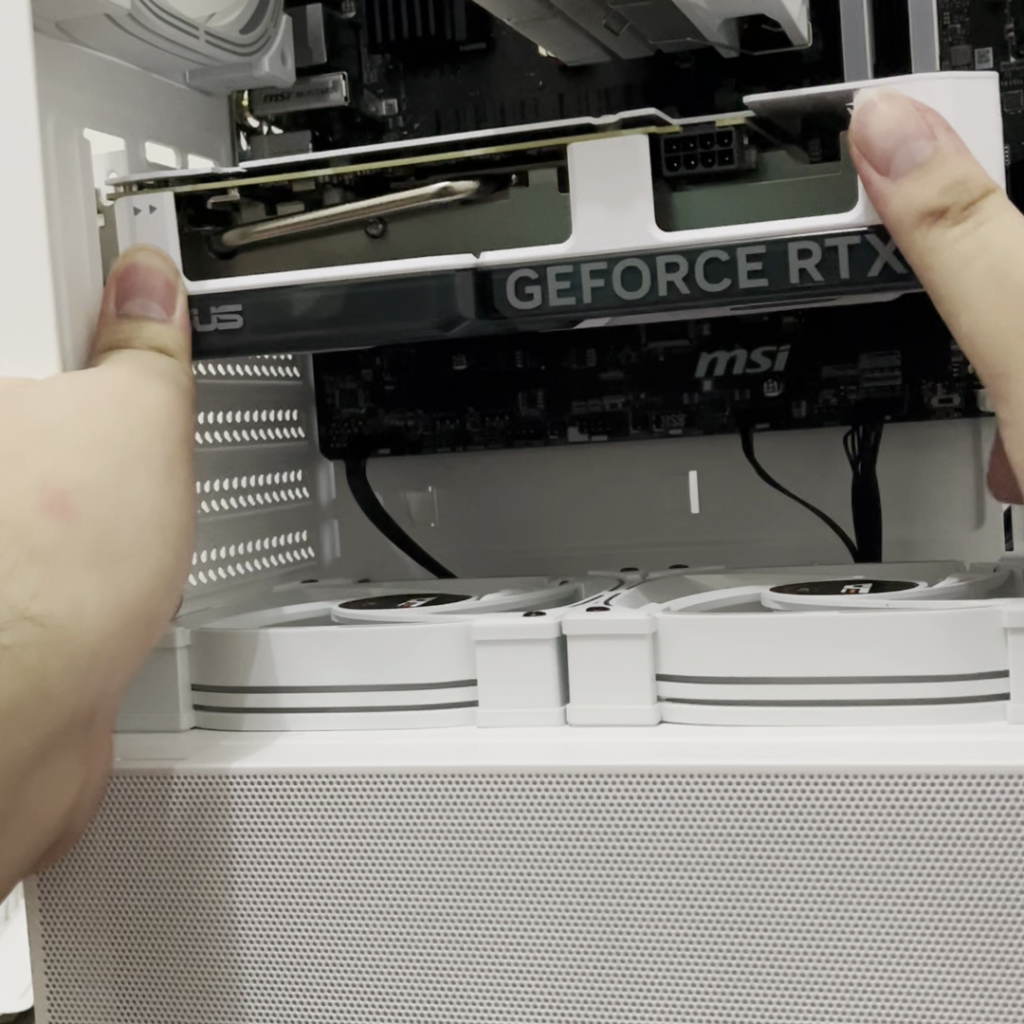
But wait, you need to install the final important component in your PC build, and it is the graphics card. Plus, you also need to make your cables look neat at the back of the case.
To install a graphics card, just unscrew the PCI slot lock from the case using your thumb or a Philips screwdriver. Then, unscrew two or more PCIe slot covers using the screwdriver. Make sure that the graphics card that you’re going to install must fit within the length limit of your case. Press down the latch, align and insert the card into the topmost PCI Express x16 slot and push it firmly until the latch locks Then, connect one of the PCIe power connectors from the power supply unit that are applicable for the graphics card and screw the PCI lock back into the case.
Then, if you have the time, try to reroute the cables that you have connected in your computer to either back or the bottom of the case in order to make it clean and look neat. Then, sort out the cables at the back of the case by using cable ties (either using a velcro cable tie or a twist tie).
Finally, the building process of your own computer has been finished. You may now turn on to see that if it works.
Configuring the BIOS and installing Windows 11
The first thing you need to do when you finish building your computer is to connect your monitor via HDMI or DisplayPort, your keyboard, mouse and a flash drive that consist of the Windows 11 installer via USB. After that, flip the power switch on the power supply to ‘on’ and press the power button. Then, when you get to the BIOS set-up menu, try to go to the memory options screen and enable XMP (or EXPO) and Resizable BAR.
Then, make your PC go to the boot menu and select USB flash drive. From there, you’ll be able to install Windows 11 for the time on your computer. Follow the on-screen instructions and prompts during the installing process and try to sign-in with your Microsoft account if possible. Finally, once you’ve installed your operating system, connect the computer via the Internet (either via Ethernet or Wi-Fi if available) and download the necessary drivers for your system and the necessary applications for your use case.
And that’s it, congratulations! You have finally built your PC and been able to install Windows, plus the drivers and applications that you need. Enjoy using your new computer.